You’re ready to create a STEM lab or classroom makerspace for your students! Let’s do it!!! One of your very first considerations is choosing a dedicated spot for STEAM work and materials. Here are four different kinds of spaces you might think about, along with some pros and cons for each choice.

A school-wide STEM lab in a separate room
If you’re lucky enough to work in a school with an extra room available, it might be a great choice to use it as a shared makerspace. That would be especially useful if lots of teachers want to collaborate on a school-wide STEAM initiative.
Pros of a dedicated STEM lab:
- An entire classroom just for STEAM activities provides ample workspace and storage for a large variety of materials, works in progress, and completed projects.
- Furniture and storage can be arranged specifically with STEM in mind. For example, large tables in place of desks encourage collaboration, and materials bins are better stored on utility shelving than regular bookshelves.
- Everyone knows the purpose of the STEM lab, and the ritual of arriving in the space to work can set a specific mindset for STEAM work.
- Shared equipment, like robotics materials or a 3D printer, can be housed in the STEM room to provide open access to everyone in the school.
Cons of a dedicated STEM lab:
- A shared space means that teachers will probably need to sign up for specific time slots to use the STEM lab.
- You’ll need to leave your homeroom to use the STEAM space. Will that make you less likely to utilize STEM materials to their fullest potential?
- Shared space and materials can sometimes mean that they are not diligently maintained. Who will be responsible for ensuring the space is left clean, materials are restocked, and tools are functional?
Designate an area of your classroom as a STEM lab
If you want your students to have access throughout the school day to STEAM materials, consider designating one corner or area as your own classroom makerspace. Choose a shelf or cabinet that can store some basic materials and tools (small recyclables, paper, tape, scissors, etc.), and set expectations around when students can access them. If you have enough space, include a table in your classroom makerspace for an additional work surface for larger projects and collaboration.
Pros of a small classroom makerspot:
- Your students will have access to STEM materials anytime, without having to leave the classroom.
- You are fully in control of your classroom makerspace, not dependent on admin, committee, or other staff needs and decisions.
- You will be more likely to integrate STEAM activities into your regular lessons, since you have the tools and materials at hand.
- Students can choose to work in your classroom makerspace independently during centers or choice time; you don’t have to do STEM as an entire class.
Cons of a small classroom makerspot:
- You’ll need to consider how a small spot in your classroom can serve all of your students at once during the times you want to do STEM activities with your entire class.
- You may need to limit or rotate the kinds of materials you make available in your classroom makerspace depending on how limited your storage space is.
- You might not have space or budget for items like a 3D printer. However, you can always look into grant options and communal storage space, like the school library.
Build a mobile STEM lab
This is a great option for schools that want to implement a STEM initiative but lack the space for a dedicated STEM classroom. You can load up a cart or closet (or both!) with all kinds of STEAM goodies that can be checked out and brought into classrooms to support STEM learning.
Pros of a mobile makerspace:
- This is a fantastic option for sharing larger or more expensive items, especially ones that aren’t used for every STEM activity.
- School budget, or PTA funds, could be used to purchase shared supply stock.
- You can bring the mobile STEM lab into your classroom as needed, but it can be stored elsewhere when not in use.
Cons of a mobile makerspace:
- As with any shared school resource, you’ll need to establish a schedule or check-out system for when teachers want to use the STEM cart.
- You’ll still want some basic supplies on hand for when you bring the mobile STEM lab into your classroom.
- The size of the mobile STEM lab will limit the materials it can house.
Turn your entire classroom into a STEM lab!
If you’ve been doing STEAM awhile, or if you’re ready to jump in with both feet, why not turn your whole classroom into a makerspace?!
Pros of your whole classroom as a STEM lab:
- All of the above, plus…
- STEM will always be front and center in your classroom
- You’ll be inspired to find new ways to integrate STEAM into your lessons on a daily basis
- Your students will start to think of themselves as engineers as innovators in all of the work they do
Cons of your whole classroom as a STEM lab:
Let’s be honest, it would take serious money to create a decked-out classroom makerspace from scratch – work tables, storage shelves and bins, tools, materials, electronics and robotics… the list of items you could purchase for your classroom STEM lab is endless. Thankfully, though, you can start small, add items over time, and build a makerspace starting simply with a mentality of innovation and inquiry.
No matter what spaces you have available, you can design a fantastic STEM lab or makerspace for your students!
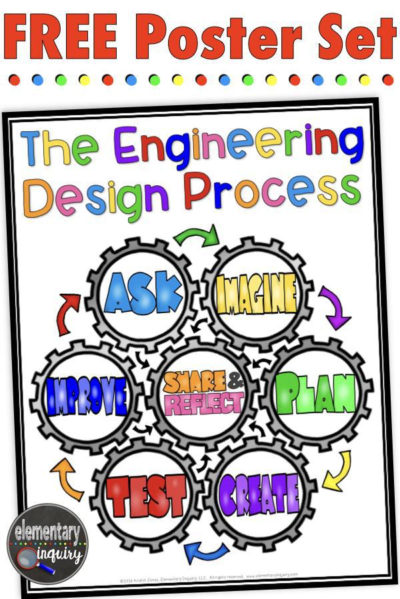
Here’s a free Engineering Design Process poster that you can add to any STEM lab or classroom makerspace.
This STEM classroom toolkit contains more posters and resources for setting up an elementary STEM program.

Once you’ve decided where you’ll set up your STEM lab, choose a fun makerspace name that perfectly describes its purpose and atmosphere! Check out this post with lots of makerspace name ideas.


One thought on “STEM Lab Ideas: 4 Places to Set Up a Classroom Makerspace”
Comments are closed.